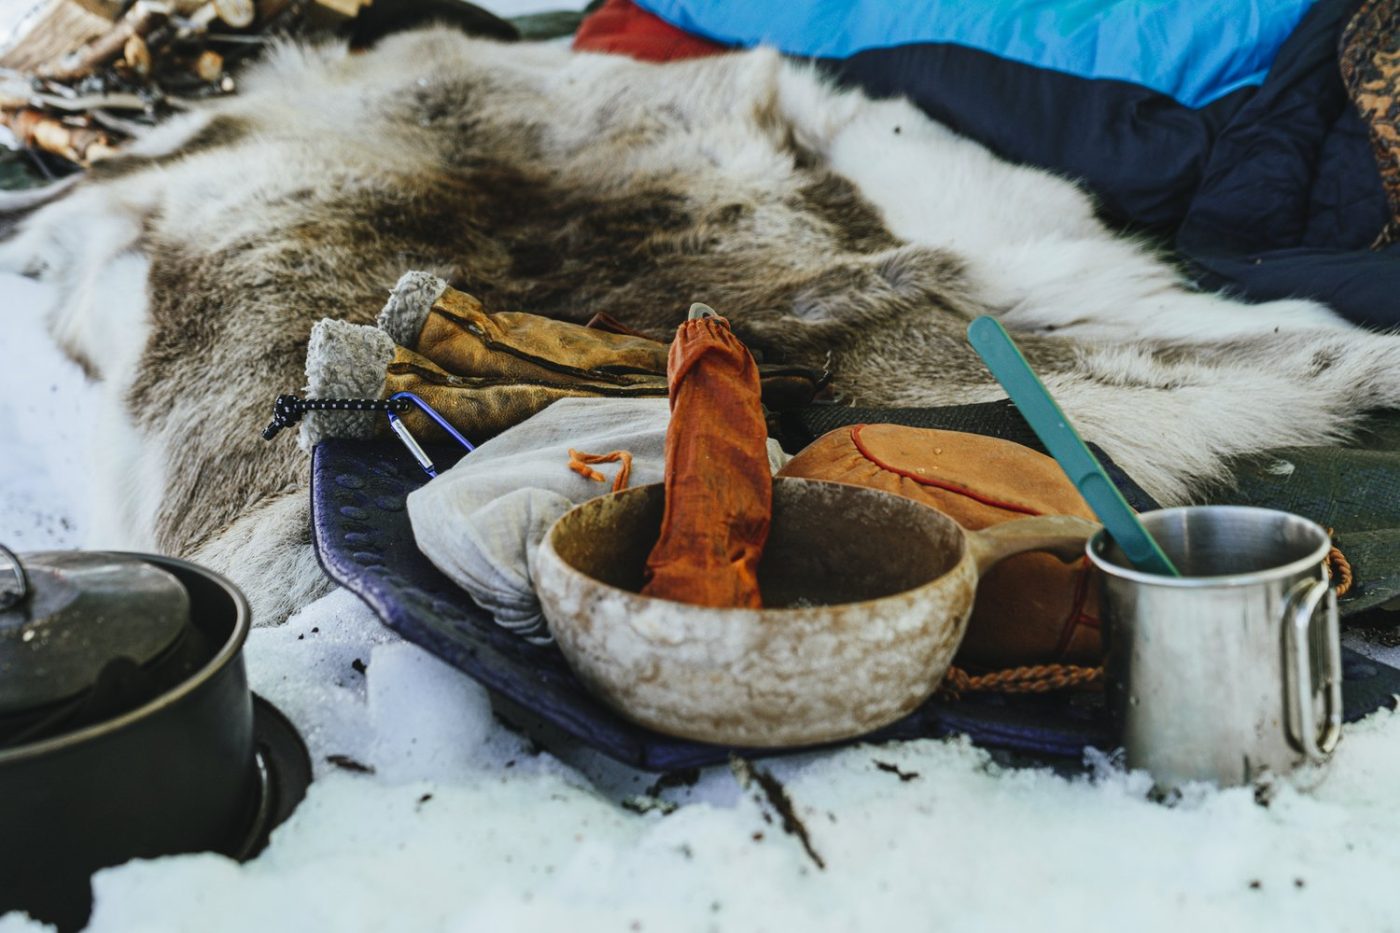
Spending a night or two outside in winter can be a real special experience. Especially when you kind of know that temperatures will be rather moderate and the weather warm and pleasant. That’s almost the ideal situation in winter. But you should know winter doesn’t equal winter. The season can vary so much depending on where you live or where and when you’re planning to go camping.
Up here in the south of Lapland in Finland the best time for winter camping is April
The snow is then (normally) compact and crusty, which is perfect for skiing and snowshoeing, temperatures in the plus section during the day and only a little bit below 0 at night. The more magical (but also much colder) moments, with snowy trees and darker nights you can experience from January to the beginning of March.
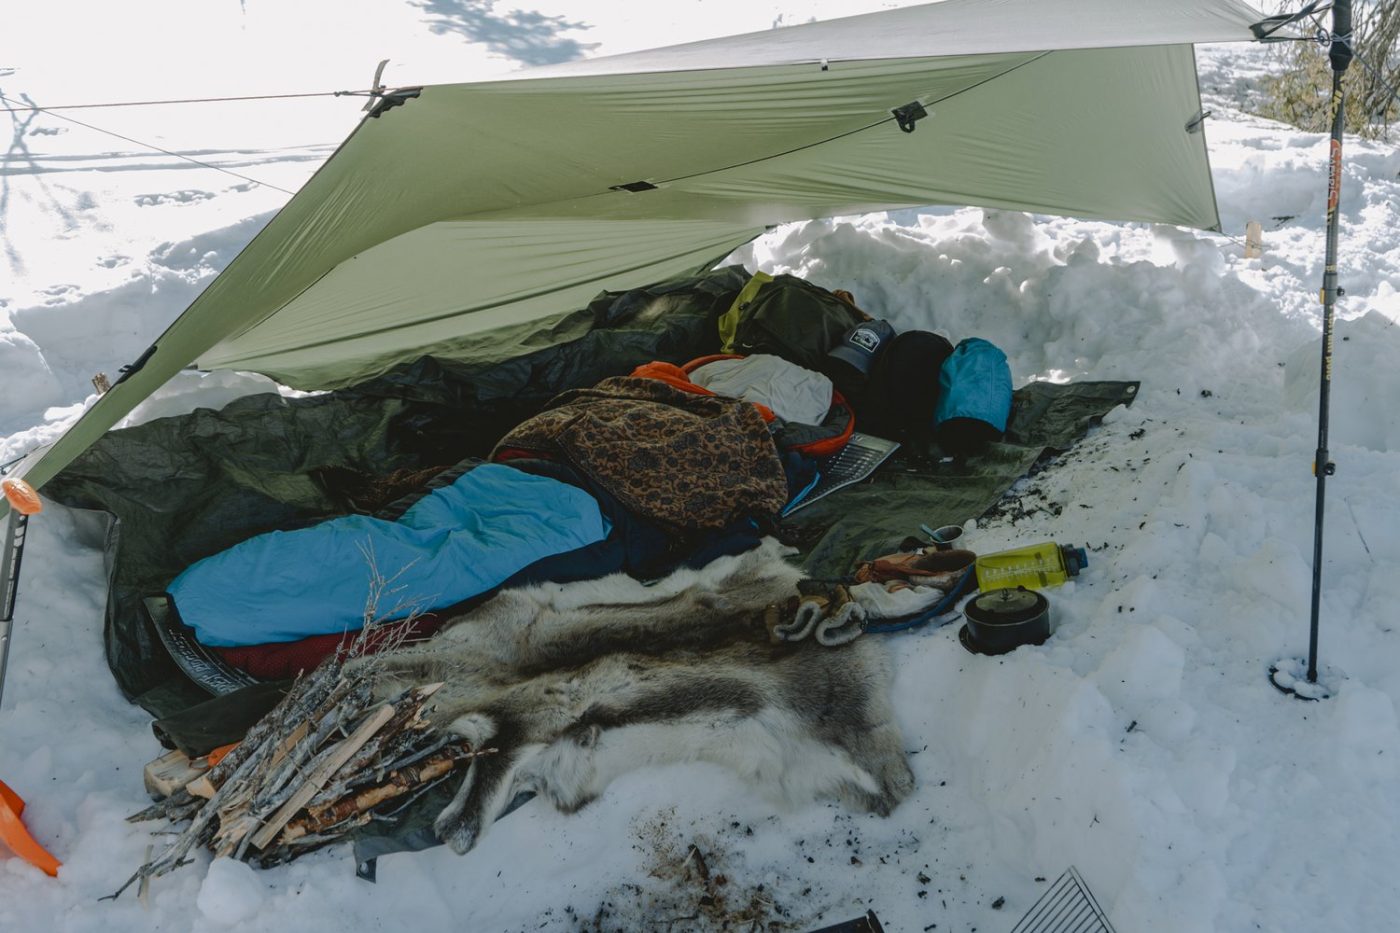
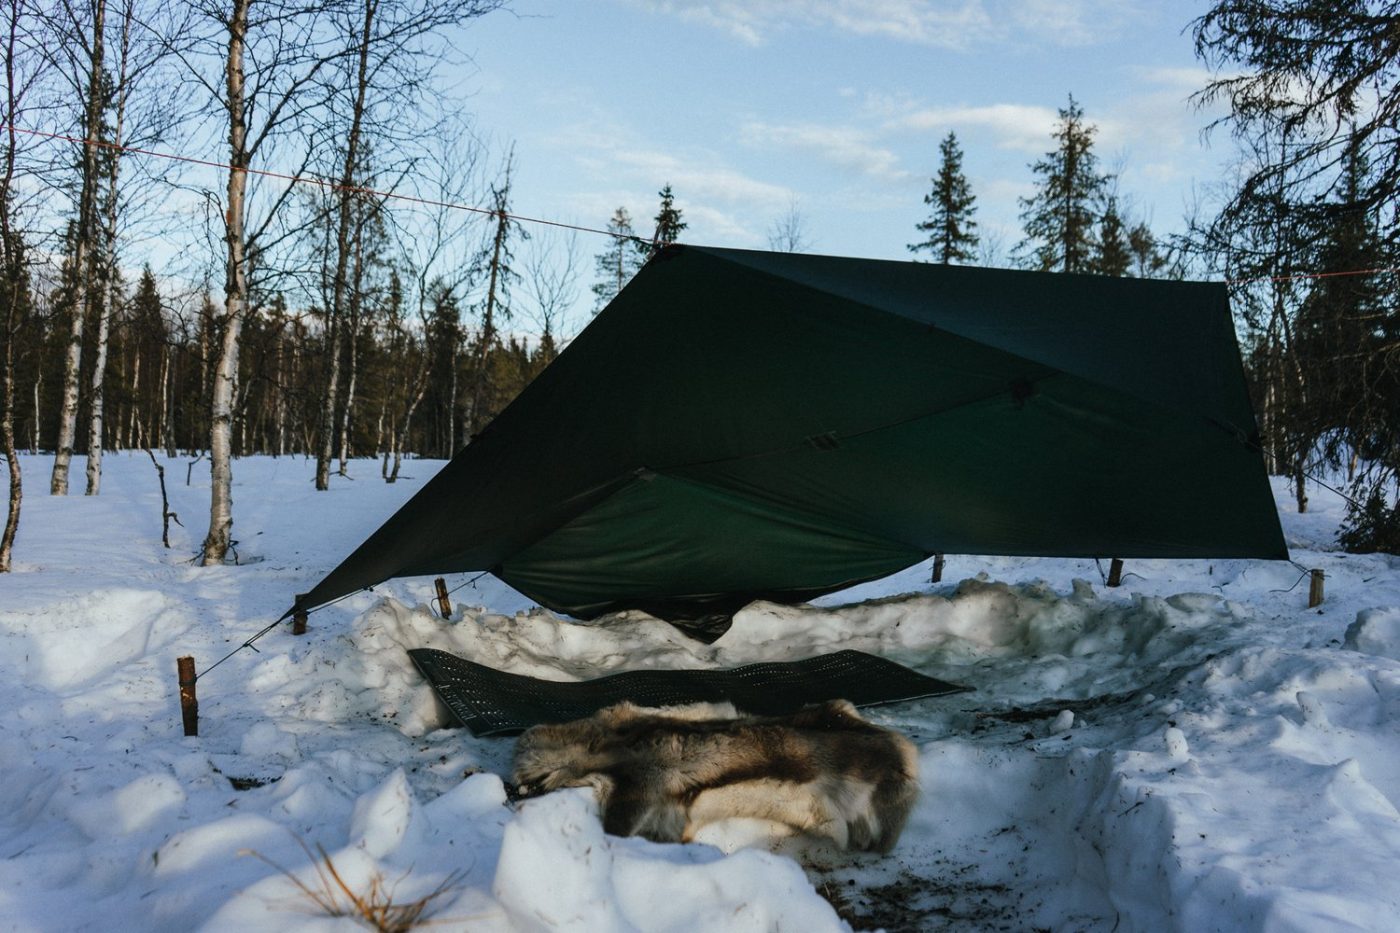
If I go camping surrounded by forest, I prefer to use a tarp as my shelter. A tent is of course suitable as well, but like the more sleeping-under-the-stars-kind-of feeling. A tarp is great for that.
(Yet again, it really depends in what sort of terrain you are in. No trees or forest isn’t convenient to set up a tarp for example.)
In theory there are hundreds of different ways to set up a tarp
Again, a lot of variations depending on weather and terrain. Winter is not so much the time you want to experiment with new styles, though. Just not so convenient. In that case know what you’re going to do beforehand. Therefore I like to show you one of my favourite tarp set ups. It can be used in every season and is quite adjustable.
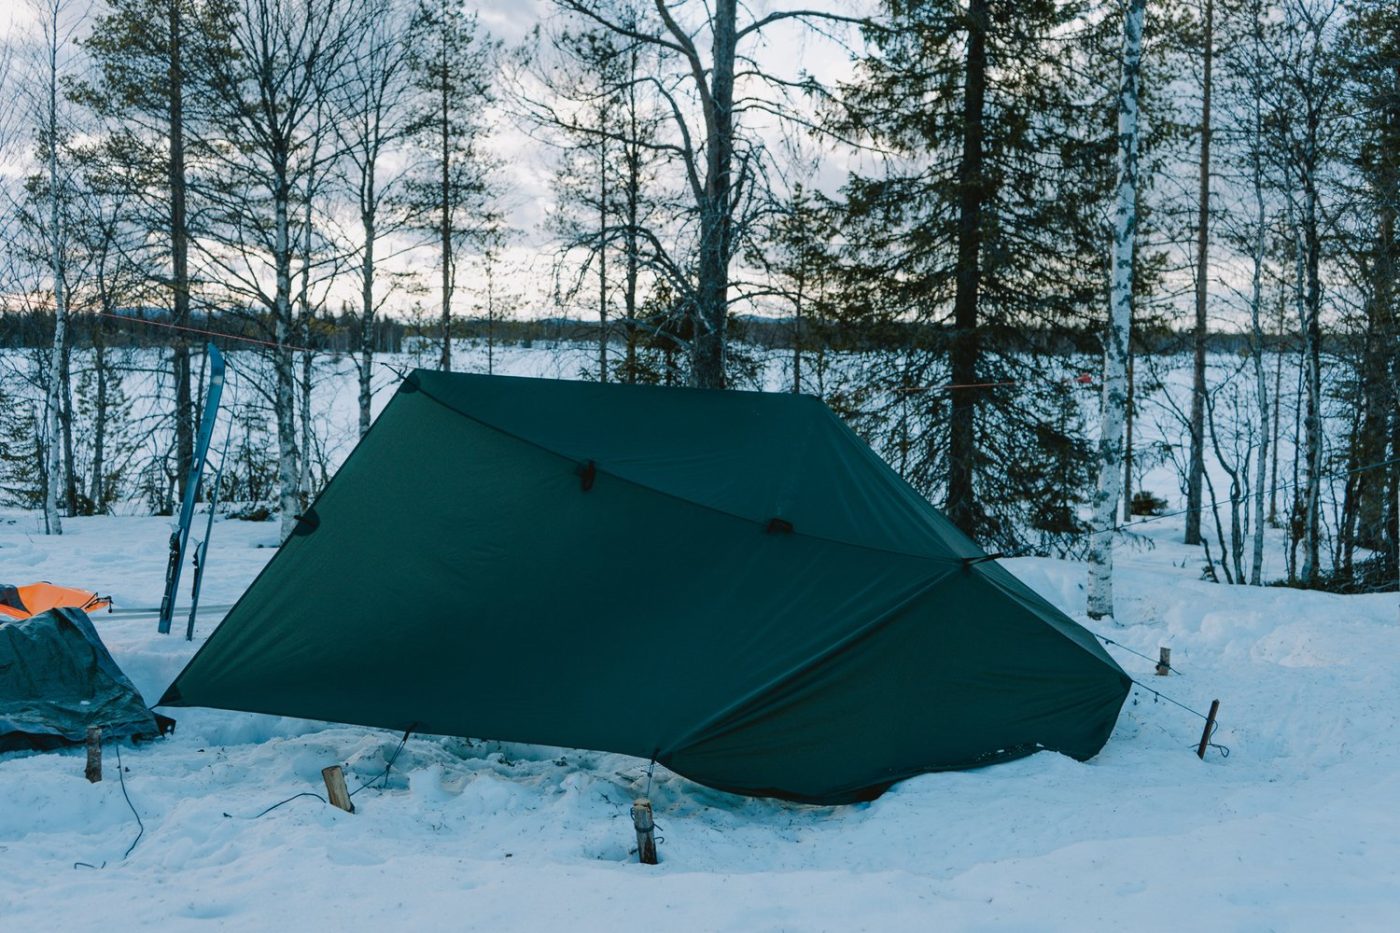
It even has a name: The Adirondack set up.
Preparation
But before I continue how we set it up I tell you what to do before starting your trip. Your tarp needs a bit of adjustments first and that’s best done at home.
First of all my tarp is a DDHammocks 3×3 tarp. This is in my opinion the most convenient size.
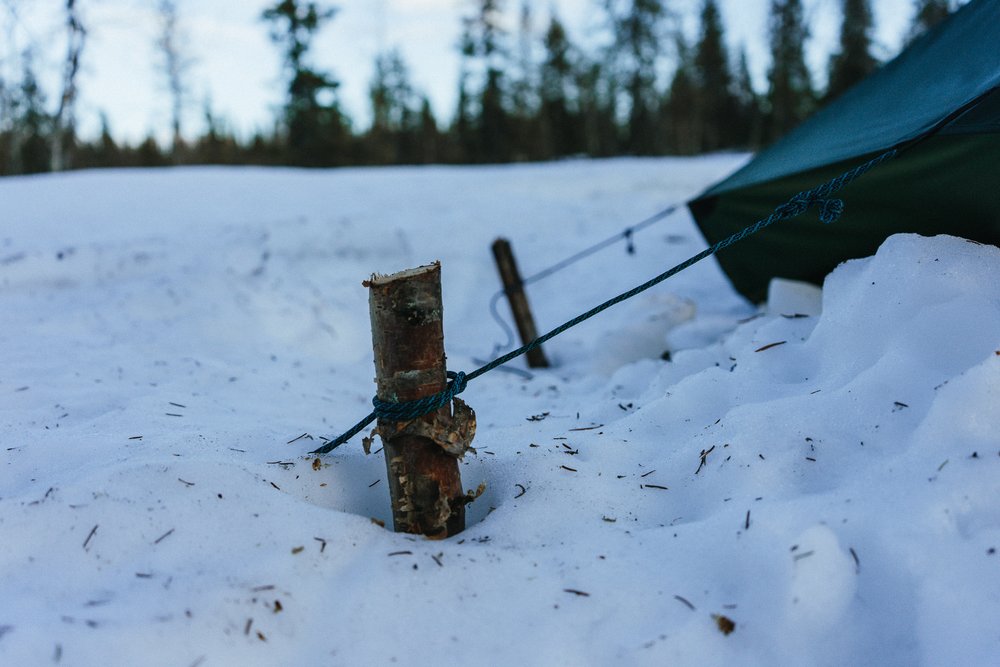
The loops around the tarp are not big enough as we cannot use normal tent pegs to tie down the tarp to the ground in winter. So what we do is, we attach paracord to the existing loops. Every string should be around 50cm long. That way you can wrap the cord around bigger pieces of wood or snow pegs, if you have them.
I also prefer to pack my tarp into a bigger pouch as the original one it comes in. It’s a lot easier to stuff the tarp into something roomier when you pack up.
Als make sure you take some spare paracord for the ridge- and guy lines. For the ridgeline I would use 15 to 20m of cord. For the guy lines 3 – 5m is something you can work with.
Tarp Setup
Sometimes it can take 20 min or an hour looking for the right spot.
1. What you need to look for is two solid trees about 5 to 10m apart. Also make sure you have enough room on either side for the tarp itself. And don’t forget to look up as well. Make sure there are no dead trees anyway nearby which could be dangerous.!!
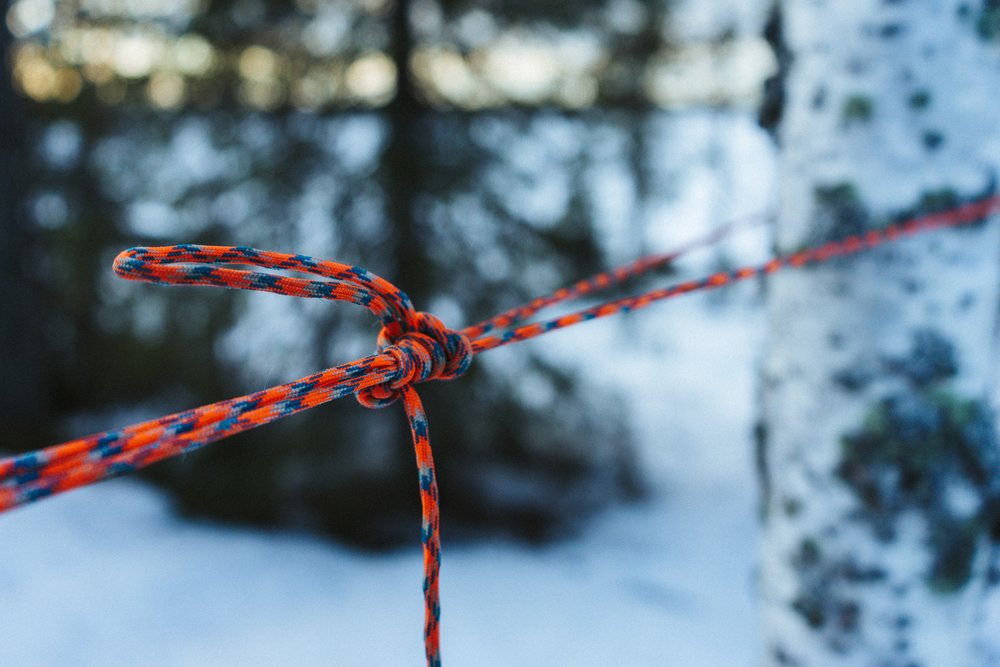
2. Get your paracord to start with the ridgline. A good height for the ridgeline is about up the height of your face. The first knot is a Siberian Hitch. It will secure the cord tightly around the tree and is easy to remove. Watch this You Tube video for demonstration.
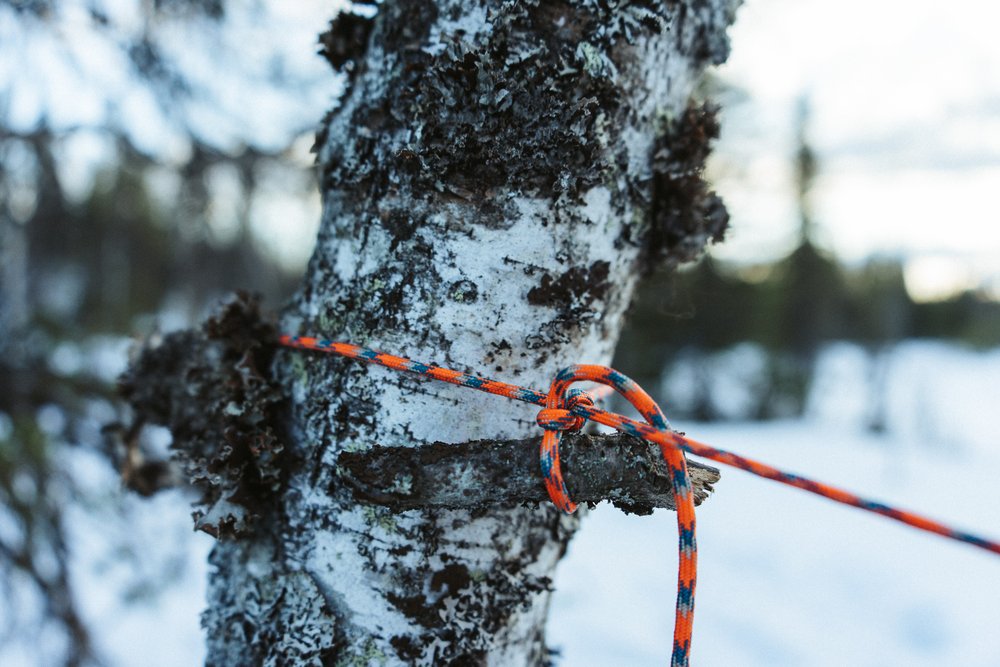
Siberian Hitch knot secured with a twig
3. It’s important that the ridgeline has a lot of tension, otherwise your tarp will pull down the rope later. A good knot to create a lot of tension is the Trucker’s Hitch knot which you’ll we do on the other tree. Continue watching the YT video from point two for an easy explanation.
Truckers Hitch knot
4. Now you need to make two loops with your spare cord (if you have paracord in a smaller diameter than your ridgeline even better). Cut off two 30cm long pieces and make a basic knot to create the loops. With these loops we will make a Prussic knot to attach the tarp to the ridgeline. It’s the best knot to attach a tarp. You’ll find a demonstration in the same YT video as mentioned before.
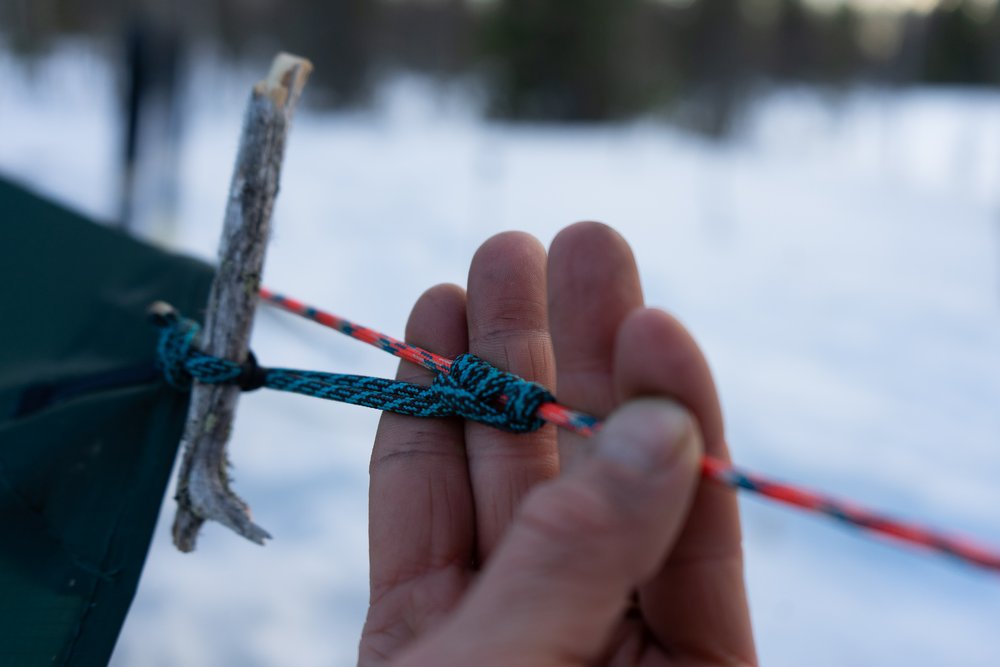
Prussic knot
5. Get your tarp ready. Have your tarp unfolded in front of you with the middle line in vertical direction. Every side has five loops (on 3x3m tarps), including the middle line. Pick up the first loop of the middle line and the middle or third loop of the left side of the tarp. These two loops will be the ones you attach to the ridgeline. To do that simply pull the front of the tarp over the ridgeline and then pull the end loop of the Prussic knot through these two loops of the tarp and secure it with a small twig.
6. Have your snow or wood pegs at reach. Now you can tie down the front corner of the tarp either directly to the ground with the help of a guy line or you can use a stick to have it higher and then tie a guy line to the ground. As mentioned in the preparation section, in winter you need some extra cord on your loops to tie them down. See photo how you can attach the rope to your peg.
-
- Clove Hitch loop
-
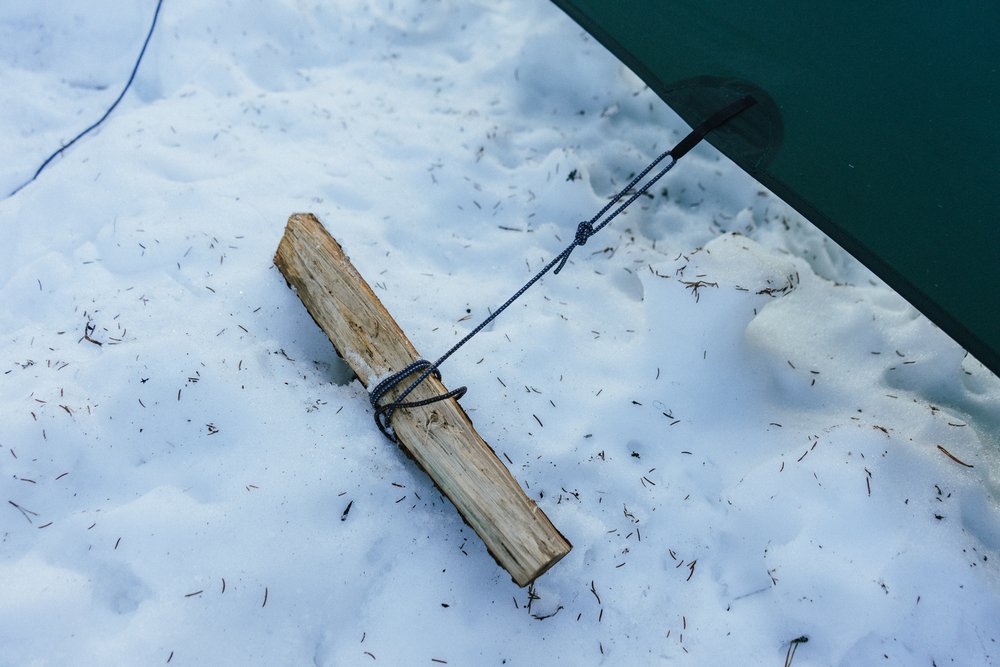
- Push down the wood deep into the snow
7. Next tie down the last loop of the now diagonal middle line at the back. If you are facing the tarp, tie down the next two loops from the middle to the right. On the other side of the middle line, the left side we skip the next three loops. This corner will go under the tarp. Then tie down the last three remaining loops.
-
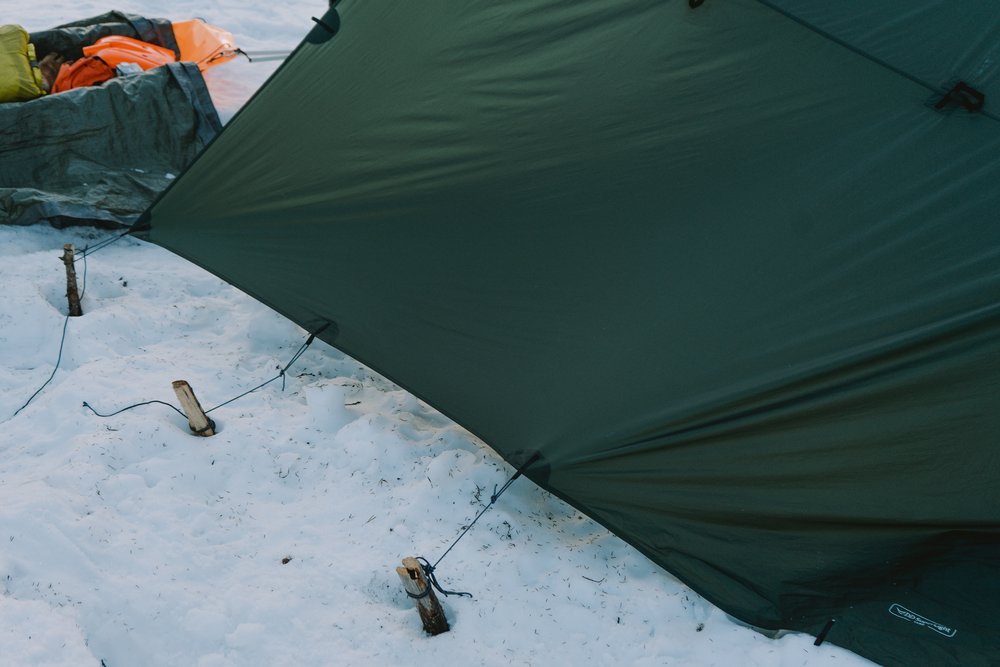
- Tie down the three remaining loops on the left
-
- Pull the corner under tarp
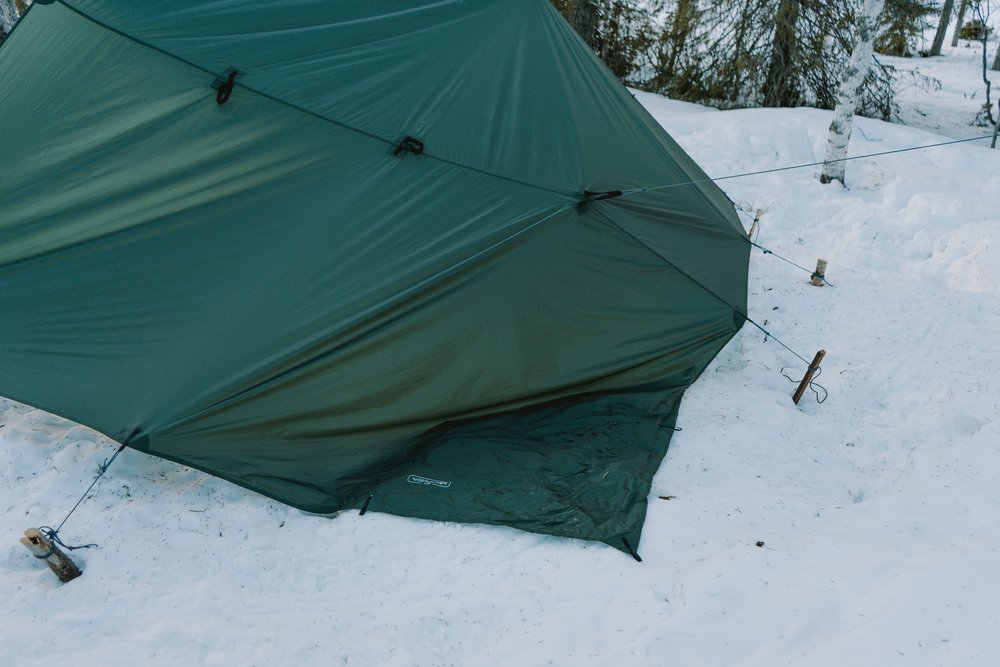
8. You can now pick up a loop from the middle line and tie it to a tree or bush nearby with the help of another guy line. This will give you more room inside the shelter.
Make a guy line from a loop of the middle line to create more room inside the shelter
Generally you can tie down the tarp all the way to the ground or leave gaps. I often leave gaps which I fill later with snow as a wind barrier.
Make sure everything is nice and tight. You might have to do some adjustments occasionally.
But that’s pretty much it. That’s the Adirondack shelter. Have fun!